
10 Easy Steps to Installing a Mini Temperature Chamber
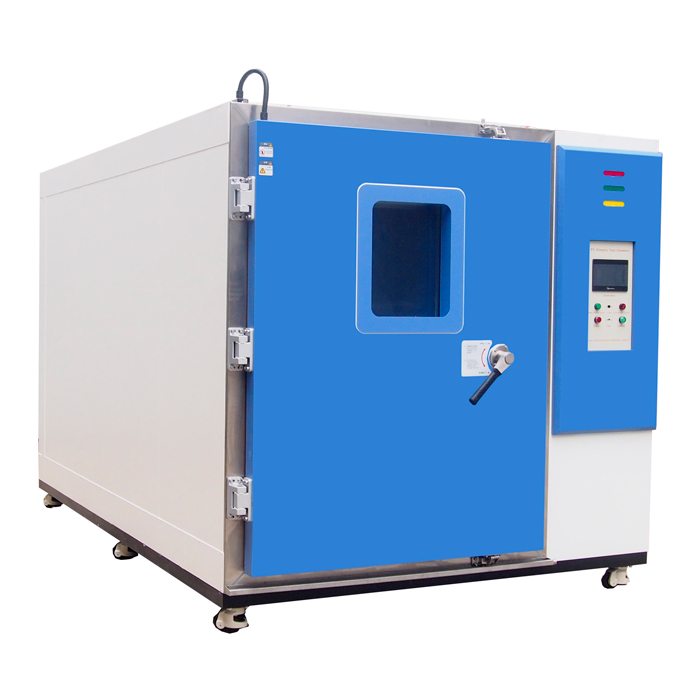
Mini temperature chambers are invaluable tools for environmental testing across various industries. These compact devices allow for precise control of temperature conditions, making them essential for product development, quality assurance, and research applications. In this comprehensive guide, we'll walk you through the process of installing a mini temperature chamber, ensuring you can set up and utilize this crucial equipment with confidence.

Preparing for Installation
Selecting the Ideal Location
Selecting the ideal location for your mini temperature chamber is essential to ensure optimal performance and accessibility. Look for a space that provides easy access for maintenance and monitoring. Good ventilation is vital to maintain temperature stability, so avoid cramped or enclosed areas. Additionally, the chamber should be situated near power outlets to facilitate easy connections. Be mindful of the chamber's dimensions to ensure it fits comfortably in the space, while also allowing for sufficient airflow around it to prevent overheating and ensure efficient operation.
Gathering Necessary Tools and Equipment
Gathering the necessary tools and equipment is a crucial step before starting the installation of your mini temperature chamber. Begin by collecting essential items such as a level to ensure proper alignment, a comprehensive screwdriver set for various screws, and a wrench set for tightening bolts. Additionally, review the manufacturer’s instructions for any specialized tools that may be required. By assembling all these tools beforehand, you can create a more efficient and organized workspace, ultimately making the installation process smoother and minimizing potential delays.
Reviewing Safety Precautions
Reviewing safety precautions is vital before beginning the installation of your mini temperature chamber. Start by thoroughly reading the safety guidelines provided by the manufacturer, which often cover essential topics such as electrical safety, proper handling techniques, and specific precautions tailored to your model. Pay close attention to warnings regarding potential hazards, as well as recommendations for personal protective equipment. By prioritizing these safety measures, you not only protect yourself during the installation but also ensure that the chamber operates correctly and safely, paving the way for a successful setup.

Step-by-Step Installation Guide
Unboxing and Inspection
Unboxing and inspecting your mini temperature chamber is an important initial step in the setup process. Begin by gently removing the chamber from its packaging, taking care to avoid any sudden movements that could cause damage. As you unpack, closely examine all components for signs of damage, such as dents or scratches, that may have occurred during shipping. Additionally, cross-check each item against the parts list provided in the manual to ensure nothing is missing. If you encounter any issues or discrepancies, reach out to the manufacturer without delay for assistance.
Positioning and Leveling
Positioning and leveling your mini temperature chamber is a critical step in the installation process. Carefully set the chamber in its designated location, ensuring it has ample space around it for ventilation and access. Utilize a level to check that the unit is perfectly horizontal, which is essential for accurate temperature control. If your chamber features adjustable feet, make any necessary adjustments to achieve proper leveling. Taking the time to get this step right will enhance the equipment's performance and extend its lifespan, ensuring reliable operation.
Electrical Connections
Making the electrical connections for your mini temperature chamber is a vital part of the installation process. Begin by connecting the chamber to a suitable power source, carefully adhering to the electrical specifications outlined by the manufacturer. This includes checking voltage and amperage requirements to prevent any potential damage. If you have any doubts about the electrical setup or requirements, it’s wise to consult a qualified electrician. Their expertise will ensure a safe and proper connection, providing peace of mind that your equipment is set up correctly.
Final Setup and Testing
Calibration and Initial Settings
Calibration and initial settings are crucial steps in preparing your mini temperature chamber for effective operation. Carefully follow the manufacturer's guidelines to calibrate the unit, which typically includes setting initial temperature and humidity parameters. You may also need to run calibration cycles to ensure the chamber is functioning correctly. Accurate calibration is vital for achieving precise temperature control during your testing processes. Taking the time to properly calibrate the chamber will enhance its reliability and ensure consistent results in your experiments or storage needs.
Test Run and Performance Verification
Performing a test run of your newly installed mini temperature chamber is an essential step to ensure it operates correctly. During this test, closely monitor its performance for any unusual noises, vibrations, or fluctuations in temperature. Pay attention to how quickly the chamber reaches the set temperature and whether it maintains stability throughout the test period. This careful observation allows you to identify any potential issues early on, ensuring that you can address them promptly. By conducting this verification, you can have confidence in the chamber’s reliability for future testing or storage needs.
Documentation and Maintenance Planning
Proper documentation and maintenance planning are vital for the long-term performance of your mini temperature chamber. Store all important documents, such as the user manual, warranty information, and any installation guides, in an easily accessible location. This will help you quickly reference essential details when needed. Additionally, establish a maintenance schedule according to the manufacturer's recommendations, which may include regular cleaning, calibration, and performance checks. Following this plan will ensure that your chamber operates at peak efficiency, extends its lifespan, and minimizes the risk of unexpected issues over time.
Conclusion
Installing a mini temperature chamber may seem daunting at first, but by following these steps, you can ensure a successful setup. Remember, proper installation is key to the longevity and accuracy of your equipment. If you encounter any difficulties during the process, don't hesitate to reach out to the manufacturer for support.
Contact Us
For expert guidance on mini temperature chambers and other environmental testing solutions, contact LIB Industry at info@libtestchamber.com. Our team of specialists is ready to assist you with all your testing equipment needs, from selection to installation and beyond.
References
1. Johnson, A. (2022). Environmental Testing Equipment: A Comprehensive Guide.
2. Smith, B. et al. (2021). Best Practices for Laboratory Equipment Installation.
3. Environmental Testing Association. (2023). Standards for Temperature Chamber Calibration.
4. Lee, C. (2020). Optimizing Mini Temperature Chamber Performance in Research Settings.
5. Turner, D. and Brown, E. (2022). Safety Protocols for Environmental Testing Equipment.
6. Wilson, F. (2021). Advances in Compact Environmental Testing Technologies.
.jpg)